WSL2 with Windows Terminal and syncing with Mac OSX
It has been a long time since I’ve posted anything here and it’s time to bring something new to this blog that’s not cloud specific.
My work from home setup consists of a powerful Windows 10 machine with 2 monitors (in horizontal + vertical orientation). I also have a company provided Macbook Air 2019 model, which is not performing upto the mark, especially when multitasking with multiple IDE’s, especially resource-hungry Google Chrome and Google Meet.
This prompted me to configure my desktop terminal with the personalization and settings of iTerm2 on my OSX. So let’s get started…
Install WSL2 on Windows 10
For this, you need:
- updated Windows 10.
- A computer with Hyper-V Virtualization support
You can follow the Microsoft provided documentation to get started or run the steps manually mentioned below:
Enable WSL
Open the PowerShell tool as an Administrator and run the command below:
1 | dism.exe /online /enable-feature /featurename:Microsoft-Windows-Subsystem-Linux /all /norestart |
Enable “Virtual Machine Platform”
In the same Administrator Terminal, run the below command to enable Virtual Machine Platform
1 | dism.exe /online /enable-feature /featurename:VirtualMachinePlatform /all /norestart |
Set WSL 2 as default
In the same Administrator Terminal, run the below command to set WSL 2 as default
1 | wsl --set-default-version 2 |
Install a Linux distribution
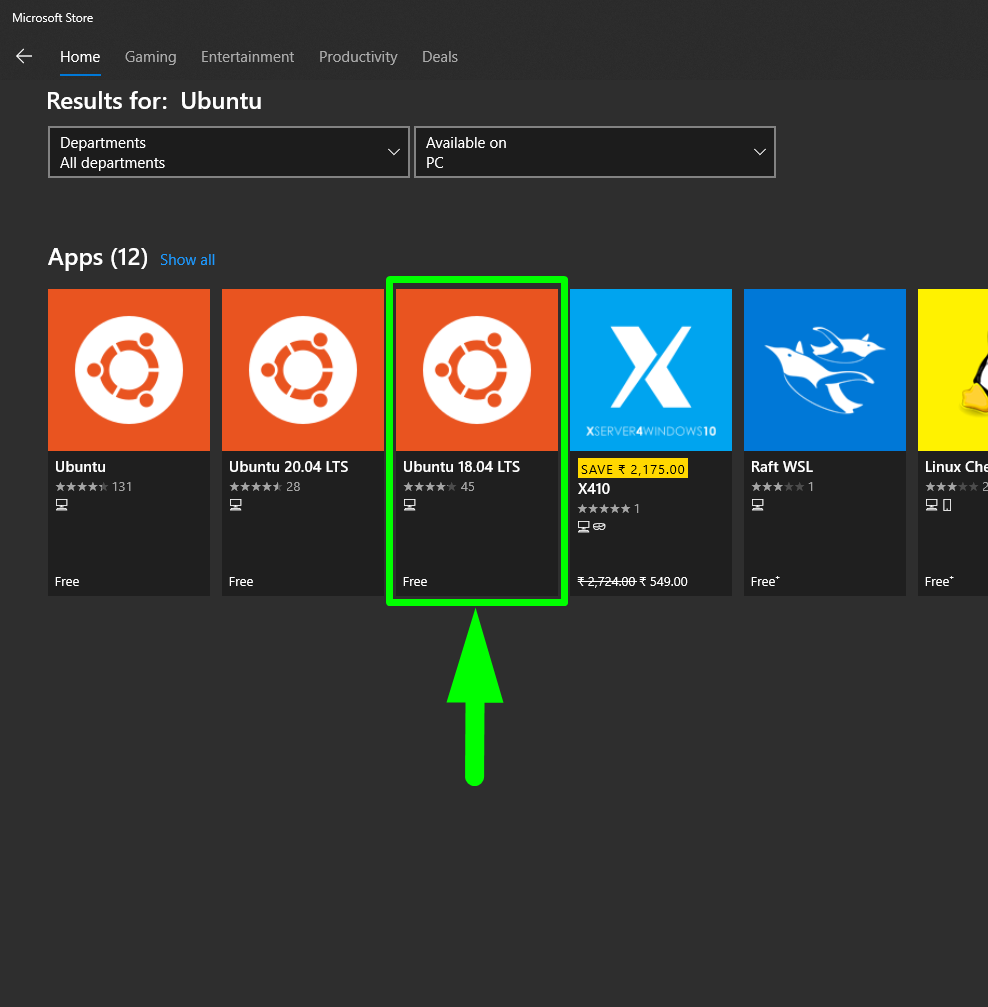
For this I went ahead with Ubuntu 18.04 LTS as it’s my preferred choice.
Open Microsoft Store and search for Ubuntu. Select Ubuntu 18.04 to install and Launch it.
Launching the distro for the 1st time will take some time to set things up in the backend.
Congratulations ! You have successfully installed the WSL 2 with Ubuntu. Update your machine with the following commands:
1
2
3
sudo apt update
sudo apt upgrade -y
sudo rebootNote the space before the 3rd command.
Terminal Configuration
Time for more fun.
In this section, we’ll configure the terminal with our configuration (in this case, mine). We all know OSX ships with ZSH by default (no Bash, because licenses and shit), so we’ll configure that here as well.
By default Ubuntu comes with Bash Shell, and no pre-installed ZSH.
Install ZSH
I prefer the package manager version for installing ZSH:
1
sudo apt install zsh -y
Verify installation by running the below command for output
zsh 5.4.2or higher.1
zsh --version
Now make your default shell to ZSH
1
chsh -s $(which zsh)
Log out and log back in and run
echo $SHELLto see zsh configured.
Install Oh My ZSH
Oh My Zsh is an open source, community-driven framework for managing your zsh configuration. It really brings out a whole new perspective in your terminal environment and will make you more productive.
I have OMZ installed on my MacBook, so I’ll be doing that here as well. Official instructions for installation are available on their Github repo, but I’ll post here for convenience:
1 | sh -c "$(wget -O- https://raw.githubusercontent.com/ohmyzsh/ohmyzsh/master/tools/install.sh)" |
Once the installation is completed, you can install themes, add your favourite plugins (I’ll share my heavily modified ~/.zshrc later). I’ll be not doing it as I will bring in my zshrc configuration file from my MacBook.
Theme I use
- Powerlevel10k (Link and installation: https://github.com/romkatv/powerlevel10k#oh-my-zsh)
Syncing between OSX and Windows
Here I’ll be sharing a beautiful method of sharing configuration files using git. Thanks to Ferry Boender and the link to the blog here: https://www.electricmonk.nl/log/2015/06/22/keep-your-home-dir-in-git-with-a-detached-working-directory/. I’d highly recommended you to go through the entire article. Very informative. We could have also used file sharing service such as Dropbox or Google Drive, but that has some issues. Also, I am not comfortable using those for this specific use case.
I’ll summarize the steps here from the blog here.
On your Github
- Create a private repo with a name of your choice (preferably with a dot prefix to keep it hidden, if supported)
On your MacBook
dgit Setup
Create a directory to hold your git database (the .git dir):
1
2
3
mkdir ~/.dotfiles/
cd ~/.dotfiles/
git init .Create a
.gitignorefile with everything ignored:1
2
3echo "*" > .gitignore
git add -f .gitignore
git commit -m "gitignore"Create a
dgitalias (magic happens here) and add to your shell profile, and source it:1
2echo "alias dgit='git --git-dir ~/.dotfiles/.git --work-tree=\$HOME'" >> ~/.zshrc
source ~/.zshrcGo to your home directory, and do
dgit reset --hard.
dgit Usage
Check Usage:
1
dgit status
Add files by overriding the ignore with
-fparameter:1
2dgit add -f .zshrc
dgit commit -m "Added .zshrc"Push to a remote repo (created earlier; I use AWS CodeCommit):
1
2dgit remote add origin ssh://git-codecommit.us-east-1.amazonaws.com/v1/repos/.dotfiles
dgit push origin master
On your WSL 2 Machine
dgit Usage
Go to your home directory and run the below commands. This will overwrite files in your home directory with same names.
1
2
3
4cd $HOME
git clone ssh://git-codecommit.us-east-1.amazonaws.com/v1/repos/.dotfiles ./.dotfiles
alias dgit='git --git-dir ~/.dotfiles/.git --work-tree=$HOME'
dgit reset --hardDone.
Note: You can add more files/folders by the command dgit add -f <file/folder> on either machine, and then dgit pull origin master on the other machine.
My Personalized Configs
.zshrc
Since some commands behave differently on OSX (BSD based) and Linux (GNU based), I have added an if-else-fi clause in my .zshrc file to keep the commands working properly.
1 | # Enable Powerlevel10k instant prompt. Should stay close to the top of ~/.zshrc. |
If you check under linux-gnu block, I have added a small line for PATH
1 | export PATH="$(tr ':' '\n' <<<"$PATH" | grep -Ev '^(/mnt)/c/' | paste -sd ':')" |
What this does is, it removes the /mnt/c/ PATH definitions from environment variables and just retains the paths specific to the Linux box. Keeps the path simple and easy to read.
Theme Settings
The theme I use is Powerlevel10k. Link to installation: https://github.com/romkatv/powerlevel10k#oh-my-zsh.
After installing, run p10k configure to set the terminal to your taste.
Preview

In case you want to add something to this guide, or I may have missed anything, do let me know. Do comment and share if this guide have helped you.